
Walk-In Freezer Door Sealing Techniques for 2026
October 06, 2026
Table of Contents
- Why a Tight Walk-In Freezer Door Seal Matters in 2026
- Signs Your Walk-In Freezer Door Gasket Is Failing
- How to Perform a Walk-In Freezer Door Air Leak Test
- Walk-In Freezer Door Gasket Replacement: Step-by-Step
- Walk-In Freezer Door Alignment Adjustment for a Better Seal
- Walk-In Cooler Gasket Cleaning and Maintenance Schedule
- Frequently Asked Questions
Last Updated: October 6, 2026
Why a Tight Walk-In Freezer Door Seal Matters in 2026
Freezer door sealing starts with the walk-in freezer door gasket, the flexible magnetic seal that runs around the door's edge and presses against the frame to block warm air. When that seal fails, every other part of your refrigeration system works harder to compensate.

At Averon Cooling Solutions, we build freezer doors for kitchens, grocery chains, and warehouses, and we see the same pattern again and again: the gasket is the cheapest part on the box and the first one to be ignored. That's a mistake.
Here's what a bad seal actually costs you:
- Warm, humid air pulls into the box and condenses on cold surfaces
- The compressor runs longer to hold temperature
- Frost and ice build up along the door frame
- Food sits closer to the danger zone than anyone realizes
The FDA Food Code temperature guidance is clear that cold holding must stay at or below 41°F. A leaking door makes that number harder to hold every single day.
Below, we'll walk through how to test your seal, replace a failing gasket, and keep the door tight for years.
Signs Your Walk-In Freezer Door Gasket Is Failing
The clearest sign of a failing gasket is visible frost or ice around the door frame. That frost is moisture from warm air that got past the seal and froze on contact.
Other warning signs show up before the ice does:
- Cracks, tears, or small holes in the rubber
- Gaps where the gasket no longer meets the frame
- A gasket that feels rigid instead of soft
- The door no longer pulls itself shut
- Condensation or water on the floor near the threshold
- The compressor cycling more often than usual
A common mistake is waiting for frost to appear. By then, the gasket has been leaking for weeks. Check the seal monthly with your eyes and your hands.
How to Perform a Walk-In Freezer Door Air Leak Test
A walk-in freezer door air leak test takes about two minutes and needs no tools. Run it monthly, and always after a door gets bumped by a pallet jack or cart.
Two simple methods work for almost any commercial door.
The Dollar Bill Test and Flashlight Method
The dollar bill test checks whether the gasket presses hard enough against the frame. The flashlight method finds gaps you can't see.
Dollar bill test:
- Open the door and place a dollar bill across the gasket.
- Close the door and try to pull the bill out.
- Move the bill around the full perimeter and repeat.
- If it slides out with no drag, the seal is loose at that spot.
Flashlight method:
- Have one person stand inside the freezer with a flashlight.
- Close the door and turn off the room lights.
- Run the light along the full frame edge.
- Any light escaping means air is escaping too.
Mark every weak spot with tape so you can compare after adjustments. If more than a few spots fail, plan on replacement.
Walk-In Freezer Door Gasket Replacement: Step-by-Step
A walk-in freezer door gasket replacement is a job most maintenance teams can finish in under an hour. The trick is matching the new gasket to the old one before you pull anything apart.
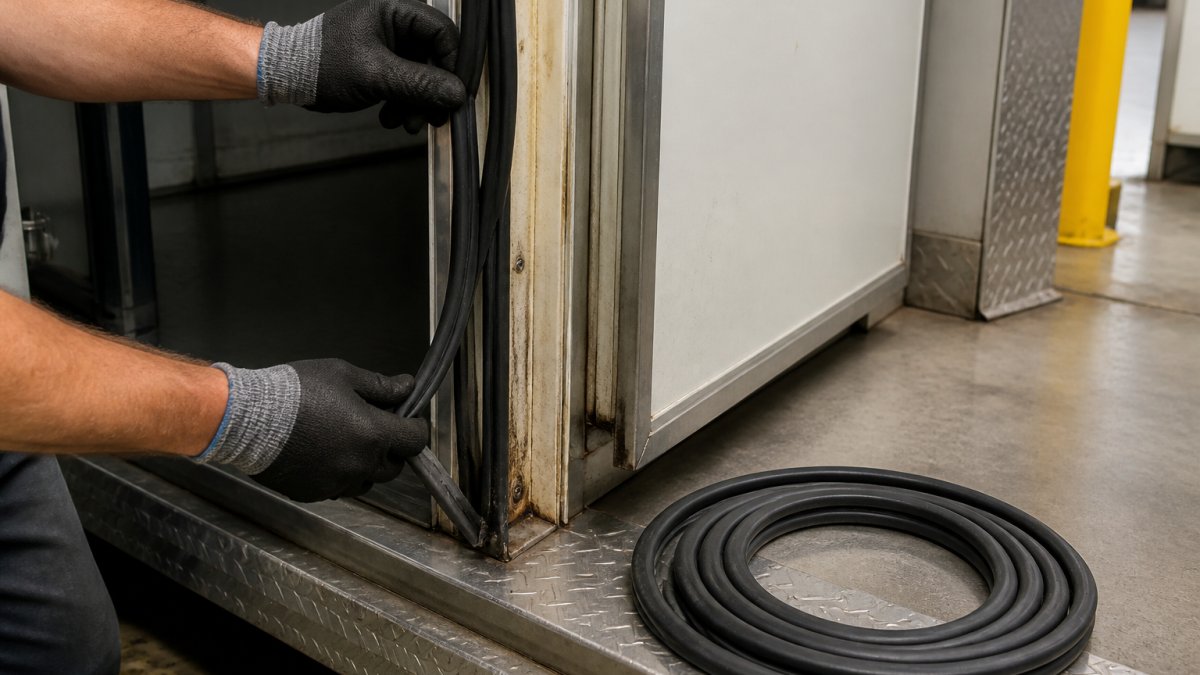
What you'll need: replacement gasket, flathead screwdriver, clean cloth, mild soap and water, and a screwdriver that matches your mounting style.
- Note the mounting style. Look for screws, a push-in channel, or a snap-in dart.
- Measure the door. Record width, height, and corner radius before ordering.
- Pull the old gasket. Start at a corner and work around the frame.
- Clean the channel. Wipe out dirt and old adhesive with soap and water.
- Press in the new gasket. Seat it evenly, corner to corner.
- Check the fit. Run the dollar bill test again around the full door.
- Adjust if needed. Small gaps often close with a hinge or latch tweak.
Matching Gasket Profile, Material, and Mounting Style
Gasket profile is the cross-sectional shape of the seal, and it must match the door frame exactly. A close-enough profile will leak.
Walk-In Freezer Replacement Door 72" x 84" — Prehung with Heated Frame →
Match these three things before you buy:
| Feature | What to Check | Why It Matters |
|---|---|---|
| Profile | Shape and corner radius | Wrong shape leaves gaps |
| Material | Low-temperature flexibility | Rigid rubber won't seal in cold |
| Mounting | Snap-in, dart, push-in, or screw-in | Wrong style won't stay seated |
Freezer doors need gasket material rated for low temperatures. Standard cooler gaskets harden in freezer service and stop sealing within months.
Walk-In Freezer Door Alignment Adjustment for a Better Seal
Door alignment adjustment fixes a seal problem that has nothing to do with the gasket. If the door sags or sits crooked, even a brand-new gasket can't close the gap. Before you order a replacement gasket, rule out the hardware, otherwise you'll install a fresh seal against a door that physically cannot press it shut.
Diagnose Before You Adjust
Work through the door in this order. Stop at the first failure you find; that's usually the root cause.
- Look at the gap, not the gasket. Stand outside the closed door and sight along the perimeter. A gap that's wide at the top and tight at the bottom points to hinge sag. A gap that's even all the way around but still leaks points to a gasket or latch problem.
- Check the gasket contact pattern. Open the door and look at the gasket face. A healthy seal leaves a continuous, even compression line against the frame. A broken or faint line marks the exact spot where contact is failing.
- Test the latch last. Close the door and push it gently. If it moves inward more than a fraction of an inch before the latch catches, the latch isn't pulling the door tight, that's a latch or strike problem, not a gasket problem.
Hinges
- Tighten every hinge screw. Loose screws let the door drop, and the drop shows up as a gap at the top corner opposite the hinges.
- Check for worn or bent hinge pins. A pin that's worn oval lets the door sag even when the screws are tight.
- On adjustable hinges, loosen the bolts slightly, lift the door back into square, and retighten. Re-run the dollar bill test after every adjustment, small moves change the seal more than you expect.
- On self-closing hinges, confirm the door still pulls itself shut from a partly open position. If it doesn't, the hinge spring or cam is worn, and no gasket will fix that.
Latch and Strike
- Confirm the latch pulls the door firmly against the frame. A latch that's loose, misaligned, or worn lets the door rest a fraction of an inch off the gasket.
- Check the strike plate alignment. If the latch is hitting the edge of the strike instead of seating in it, the door isn't closing fully.
- On freezers with a safety release or interior release, make sure the release mechanism isn't holding the door slightly ajar.
Frame and Threshold
- Check for dents, rust, or a bent threshold. A dented frame section can't make contact with the gasket no matter how well the door is aligned.
- Look at the bottom sweep. It should contact the floor evenly across the full width. A sweep that's torn, curled, or sitting above the floor lets warm air in along the entire bottom edge.
- On doors with a heated frame, confirm the heater is working. A failed anti-condensate heater lets the frame frost, and frost pushes the gasket away from the frame.
When Alignment Won't Fix It
If the door still won't seal after you've tightened hinges, adjusted the latch, and checked the frame, the frame itself is likely damaged or out of square. At that point, replacing the gasket is wasted money, the door or frame needs repair or replacement. A prehung door that ships with the gasket seated and the hardware already adjusted removes most of this guesswork, because alignment is set at the factory instead of in the field.
Walk-In Cooler Gasket Cleaning and Maintenance Schedule
Walk-in cooler gasket cleaning is the single easiest way to extend gasket life. Dirt and grease dry out the rubber and break the seal.
Follow this schedule:
- Weekly: Wipe the gasket with a clean cloth and mild soap.
- Monthly: Inspect for cracks, tears, and hardening.
- Quarterly: Run the dollar bill test and check door alignment.
- Yearly: Replace any gasket showing wear, no matter how small.
Always dry the gasket after cleaning. Moisture left in the channel freezes and pulls the seal away from the frame.
Lubricants That Keep Gaskets Flexible at Low Temperatures
A food-safe silicone lubricant keeps gaskets soft and pliable, which is what makes freezer door sealing last in cold conditions. Apply a thin coat to the gasket surface every few months.
Avoid petroleum-based products. They degrade rubber and leave a film that traps dirt.
A failing freezer door seal quietly raises your energy bill, shortens equipment life, and puts food safety at risk. Most of the fix comes down to a simple routine: test monthly, clean weekly, and replace worn gaskets before they fail.
At Averon Cooling Solutions, we build custom walk-in freezer doors made to your exact rough opening, with heated frames, replaceable anti-condensate heater wire, and prehung hardware already installed and adjusted. That means fewer seal problems from day one and a faster install when you need it.
Get a quote from Averon Cooling Solutions and lock in a door that seals right the first time.
Frequently Asked Questions
How do you check whether a walk-in freezer door is sealing properly?
Close the door on a dollar bill at four points: top hinge side, top latch side, bottom hinge side, and bottom latch side. If the bill pulls out with no resistance, air is escaping there. Repeat with a flashlight inside a dark box, looking for light along the perimeter. Any visible light or a bill that slides free means the freezer door sealing has failed at that spot and the gasket or alignment needs attention.
Why is frost forming around a walk-in freezer door?
Frost and ice build up when warm, moist room air reaches a cold surface through a gap. The usual causes are a rigid or cracked gasket, a door that no longer sits square in the frame, or a failed anti-condensate heater wire in the frame. Check the seal first with a leak test, then inspect hinges and the latch. If the frame itself is cold to the touch and sweating, the heater circuit is the likely culprit.
Can you repair a walk-in freezer door gasket, or does it need to be replaced?
Small tears under an inch can sometimes be patched with food-grade silicone, but a gasket that has hardened, flattened, or separated from its mounting channel will not seal again no matter how you patch it. Low-temperature flexibility is what makes the seal work, and once that is gone, replacement is the only reliable fix. Budget for a full gasket replacement rather than repeated patches.
How often should a walk-in freezer door gasket be inspected?
Inspect monthly and do a full clean and condition quarterly. High-traffic kitchens and distribution warehouses should check weekly, since every opening wears the gasket and the bottom sweep takes the most abuse. Keep a log of inspection dates and note any hardening, cracking, or gaps so you can catch a failing seal before it drives up compressor runtime and energy costs.